
Are you tired of staring at your home’s worn-out or damaged roof shingles? Fear not; we’ve covered you with our 2023 Guide to Replacing Roof Shingles in just 5 simple steps.
This comprehensive guide will teach you everything from identifying the signs that indicate it’s time for a roof makeover to executing a perfect roof replacement like a pro.
Signs That Indicate Roof Shingles Need Replacing
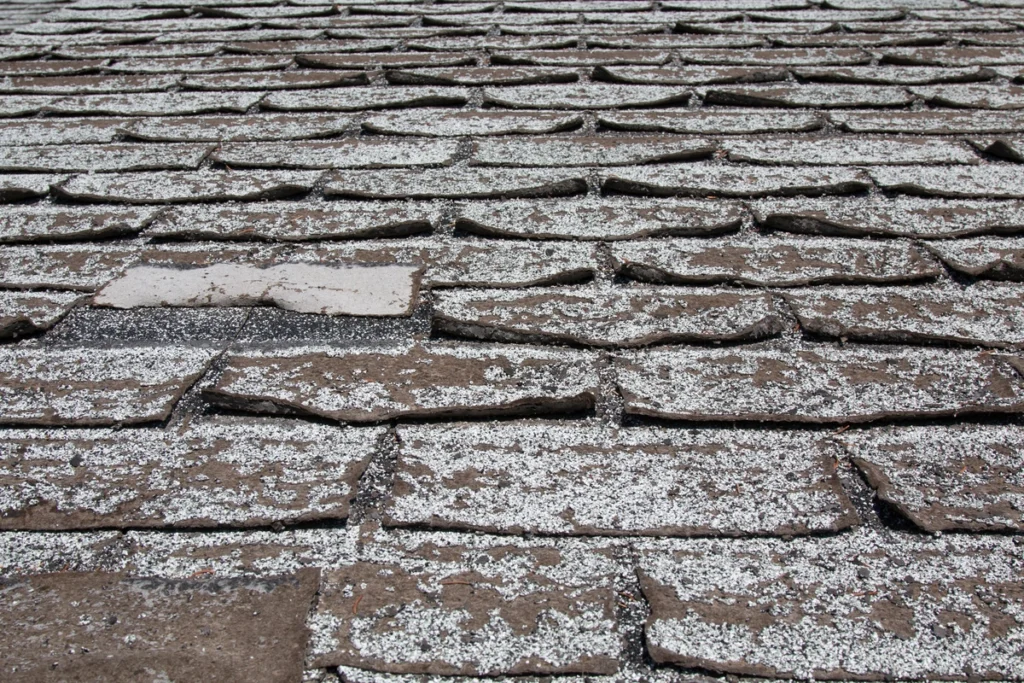
Roof shingles are critical in protecting your home from the elements, and knowing when to replace them is essential for maintaining your roof’s health. One common sign is curled shingle edges resulting from long-term exposure to sunlight or weathering.
Cracked or buckling patches on your roofing materials can signal that it’s time for new shingles. These issues arise due to aging, improper installation, or excessive moisture buildup in your attic space.
Water damage within your home – particularly along ceilings or walls – could indicate damaged roof shingles. Sagging areas on your roof may hint at severe structural damage beneath the surface of the old roof and warrant immediate attention.
DIY Roof Shingle Replacement in 5 Simple Steps
If you plan to replace your roof shingles yourself, following these 5 simple steps can help make the process of replacing asphalt shingles easy and efficient.
The first step in replacing your roof shingles is carefully removing the damaged ones and any surrounding shingles that might be affected. Use a flat pry bar to gently lift and separate the edges of each damaged shingle before lowering it from its position on the roof deck.
In Southern California’s cool weather environment, laying down the first row of new asphalt shingle sheets requires careful attention to detail according to our guide: Begin placing a new row starting at the bottom edge and working upwards towards the peak, making sure that each sheet overlaps previous one slightly, ensuring a proper moisture barrier.
For best results, attach and seal them using four nails per tab (six if high wind area), driving each nail close to both the top & bottom edges, sealing firmly to ensure longevity.
Assessing Damage and Preparing for the Repair
Start by thoroughly inspecting your roof from outside and inside, focusing on areas with visible signs of wear or leakage.
You may notice granule loss in your surrounding asphalt shingles or cracked and curled roofs.
Proper preparation ensures a smooth repair process and helps prevent further issues. Gather all necessary materials, such as new or replacement shingles, roofing nails, flat pry bars, utility knives, hammers, sealant, and safety equipment.
Consider scheduling the repairs for cool weather periods; this allows new shingles to be set in place without softening from excessive heat.
Step-by-Step Shingle Replacement Guide
If you notice damaged or missing roof shingles, addressing the issue is essential to prevent further damage. This guide makes replacing roof shingles a simple DIY project that anyone can tackle.
After assessing the damage, carefully lift the surrounding shingles and remove any nails holding the damaged one in place. Then, slide a new top shingle directly into position and secure it with roofing nails, ensuring it lines up with the existing shingles.
Applying sealant along the bottom and top edge of the new shingle will help protect against moisture and ensure a tight fit.
Tips for a Successful Roof Shingle Replacement
When removing damaged shingles, be careful not to damage surrounding shingles. Use good weather conditions or apply ice to make old asphalt shingle with adhesive brittle enough for removal without damaging existing ones.
Always remember to take safety precautions. Wear appropriate footwear while using fall protection equipment.
Following these simple tips for DIY roof shingle replacement coupled with thorough research and planning, homeowners may save themselves from unnecessary expenses while keeping their roofs intact.
Common Mistakes to Avoid
Fitting new roof shingles over old ones is a definite no-no. It may seem cheaper, but this will cause problems as old shingles’ added weight and moisture can damage your roof.
Secondly, using mismatched or poor-quality shingles can lead to unsightly patches on other areas of your roof. Thirdly, improper nail usage is also a mistake that can cost you dearly.
Another mistake many people must correct when replacing their roof shingles is using the wrong coating or adhesive material, which can compromise its durability against harsh weather.
Final Steps and Roof Maintenance
After successfully replacing damaged shingles, there are a few essential final steps. Ensure all debris and nails from leftover shingles are removed, which can cause damage or injury if left unchecked.
Regular maintenance is critical in ensuring the longevity of your roof. Scheduling annual inspections by professionals will help identify any issues before they become significant.
Factors That Affect the Cost of Roof Shingle Replacement

The cost of replacing roof shingles can vary. The type of roofing material, roof system materials, labor, and time to complete the job are all important considerations when determining how much it will cost.
The size of your roof is another factor. If your house has an extensive roof structure, it may take longer for a contractor to complete it.
Repair versus replacement is essential when dealing with damaged or old roofs. Repairing smaller sections can save you money, but it’s critical to adequately assess the condition of your current roof before making decisions.
When to Hire a Professional for Roof Shingle Replacement
While a DIY or shingle roof replacement can save money, there are better options. Sometimes, it’s necessary to hire a professional roofing contractor due to the job’s complexity.
If your roof is steep or has multiple levels, navigating without proper training may be challenging.
While taking on a DIY project can save you money upfront, calling professional help can prevent future accidents and ensure your roof stays in excellent condition.
Conclusion
Installing and replacing your roof shingles doesn’t have to be daunting. With this guide, you can save time and money by following the 5 simple DIY steps.
Remember to take safety precautions during the process and avoid common mistakes. Consulting a professional roofing contractor is always best if you need more clarification.